Applications
In this section, we'll talk a little bit about how to use different applications on our clusters.
A Simple Python Program
First, we have an example python script that we will be using just as a test problem for our sessions this week as well as in week 4.
Please use your favorite command line text editor
(like vim or nano) to add this file to your cluster
account and save it as example.py.
| example.py | |
|---|---|
copy/paste in the terminal
To copy in a terminal, use ctrl+shift+c
To paste in a terminal, use ctrl+shift+v
vim commands
vim example.pyto open this file in vimato enter edit modectrl+shift+vto paste file contentsescto exit insert mode:wqto save and quit
This script creates two random matrices, of size five thousand by five thousand and multiplies them together. It then prints out the mean of the resultant matrix. It's not useful scientifically but it does take some time for the computer to do this problem, so it's helpful to use as a toy problem.
Next, let's try running it:
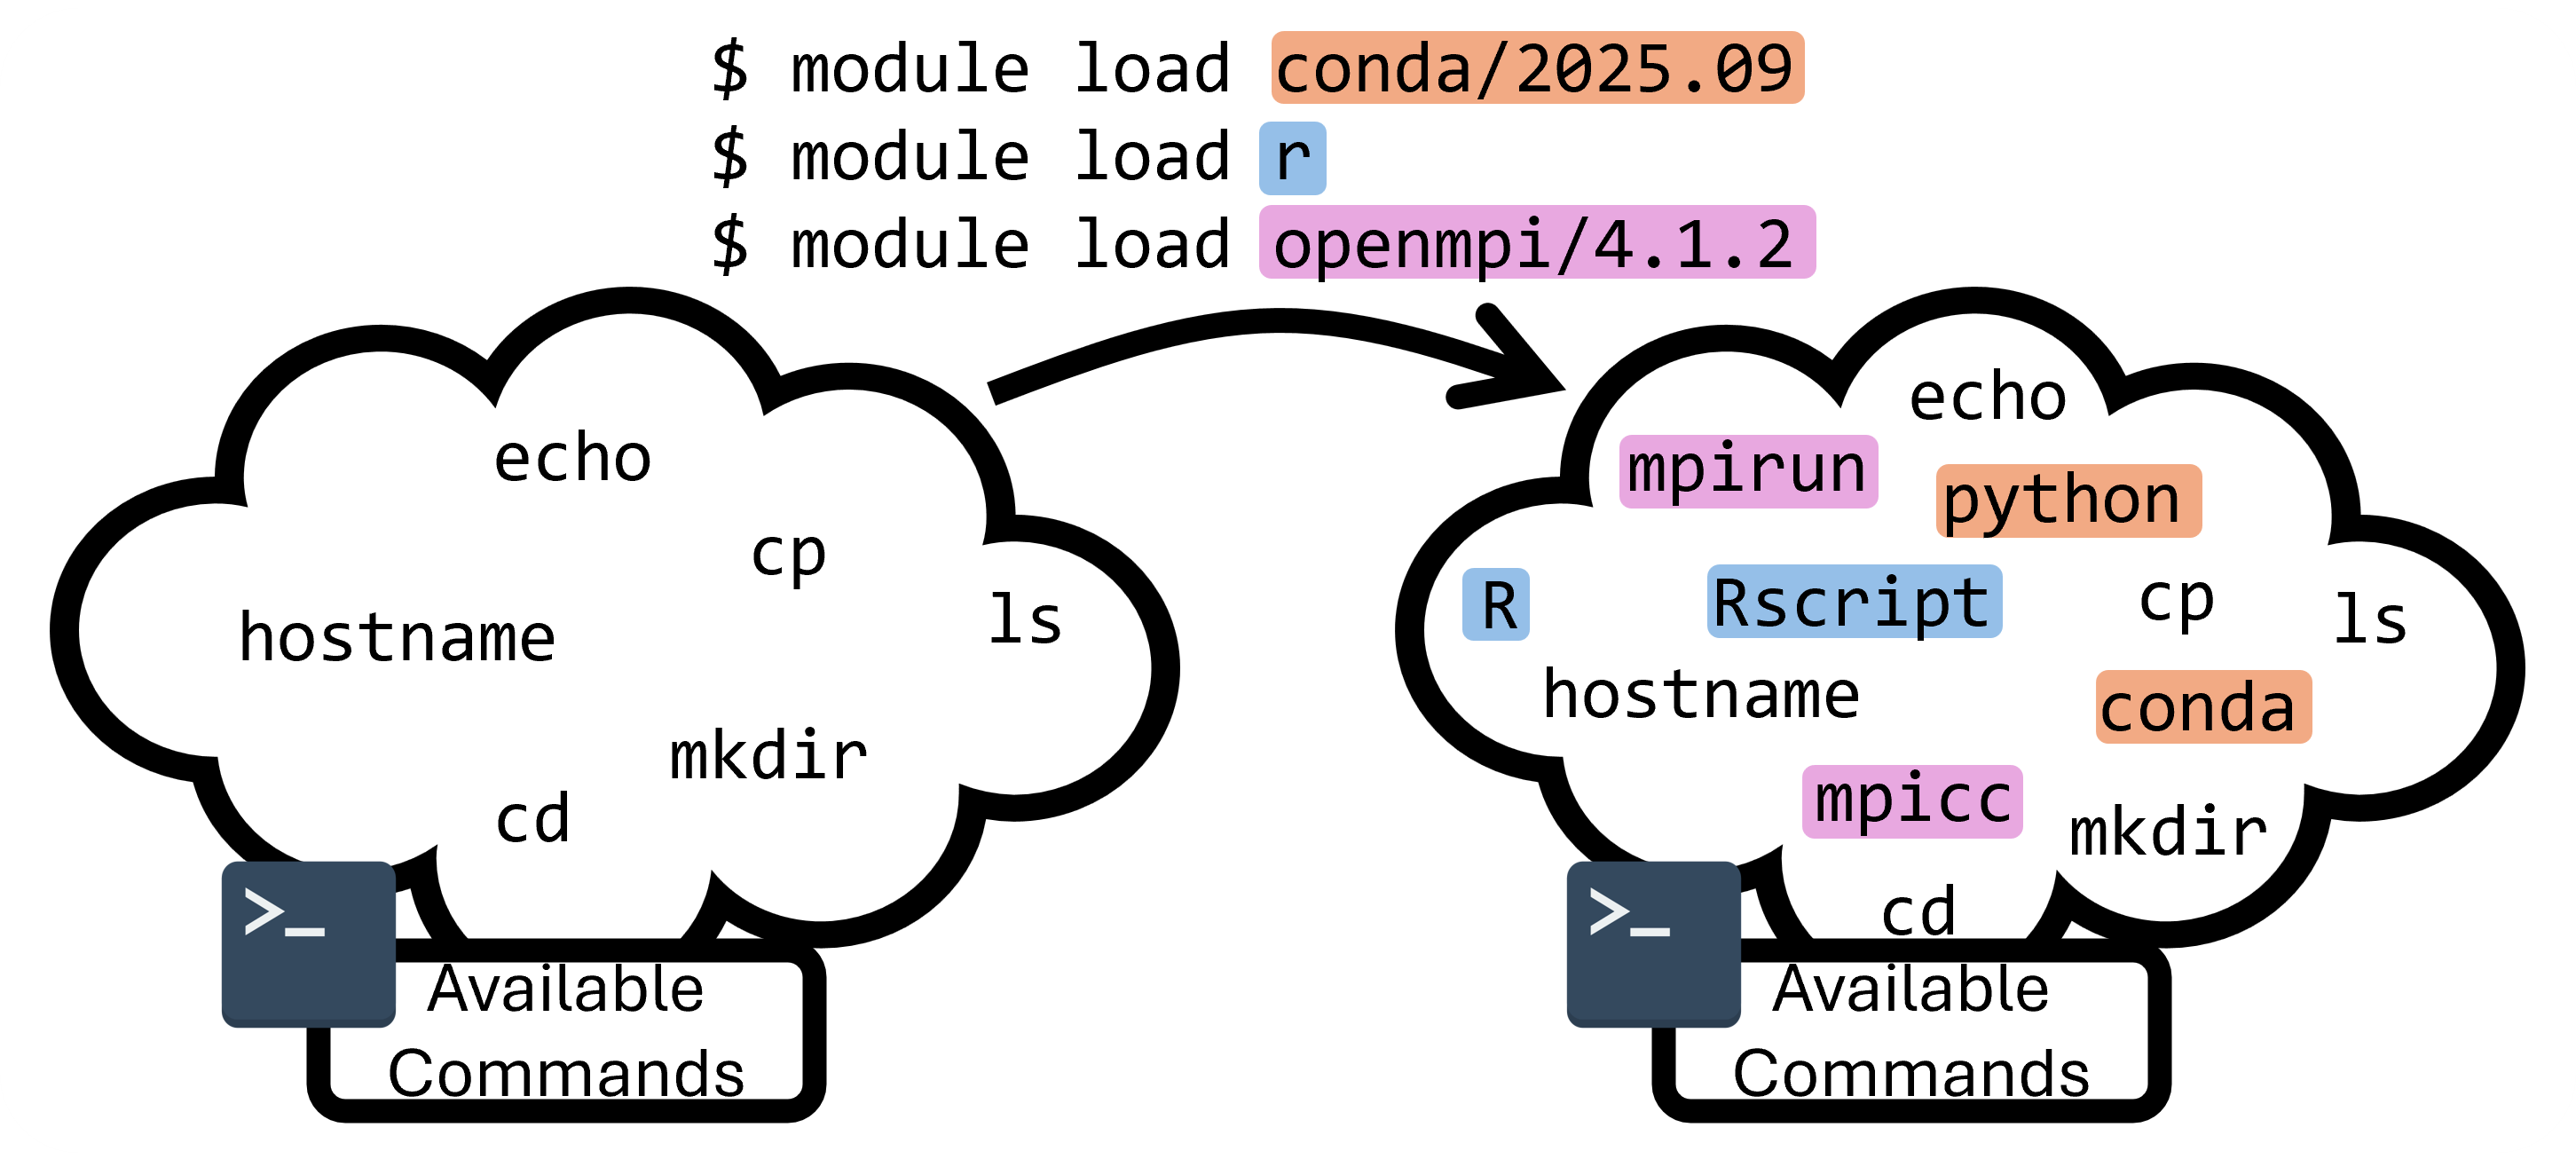
Wait, what? Why didn't that work? The system doesn't know about python yet, we haven't loaded it.Module System
There are too many versions and conflicting software to have every version of every application pre-installed for all users all the time. To get around this problem, we use a module system called Lmod. This module system can load and unload programs and commands within your shell environment.
As an example, run the command module list to list all currently loaded modules:
module commands that we can use to learn about what's available on the system and what our current environment is:
| Command | Description |
|---|---|
module list |
List currently loaded modules |
module load |
Load a module by name (and version) |
module unload |
Unload an already loaded module |
module avail |
Search for currently available modules |
module spider |
Recursively search the entire module tree |
module purge |
Unload all currently loaded modules |
module reset |
Revert to the default module set |
module show |
Show the module definition |
module help |
Show help message for a module |
If we want to run a python script, we'll need to load a module that provides the python command. On RCAC clusters, we provide python through the conda environment manager, which is available as a module.
Now let's load conda to get our python loaded in!
which command
whichis a nice program that will tell us where the specified program is coming from. Remember that everything is a file!whichtells you what file starts the program when you run a command.
Now that we have python ready and our script is written, let's run it:
Numpy error
On some RCAC systems, the numpy library isn't available in the "base" conda environment, and you may need to make your own python environment, and you may see errors like this:
We're going to make our own conda environment to install numpy for ourselves. Run these three lines of code to create the environment, activate it, and then run our example:
The first line creates a new conda environment named example_env, and automatically installs the numpy package in it. The second line changes your shell behavior so that it is using your new conda environment. You can tell that the environment is activated as conda will alter your prompt to contain the environment name. If you check which python you are using after you run conda activate example, you'll see that now your using a python that's installed in your home directory!
conda environments like this are often an easy way to install packages and libraries without the need for sudo (admin) privileges.
Putting it into a Script
Notice that it took several shell commands to run this python program. If we don't want to type out all the commands every time we want to run, we can put them into a script! We'll talk about scripting more in week 3, but for now we can think of a script as a series of commands that we put into a file, that are all ran when we run the script. For example, if we put our commands in a file titled run_example.sh:
Remember that when we log onto the clusters, we are typically placed on the login nodes, which aren't meant for computationally expensive tasks. This is a computationally intensive task that we should instead run on the compute nodes, which we'll cover in the next section!
Next Section: Cluster Job Submission