Gautschi's Universal Software Launcher
Want to launch applications through ThinLinc, and think it is difficult to remember all the necessary Slurm options to launch things on compute nodes? There is a launcher for that!
In ThinLinc, you may be familiar with the couple of application launchers that are available for specific applications, including:
- Comsol
- MATLAB
- QGIS
- RStudio
- Stata 19
- Windows Server
But did you know that there is an additional launcher that can launch any application on Gautschi? It is called the "Universal App Launcher." It guides you through the process and options necessary to launch any application you want on Gautschi on a compute node.
How to Find the Launcher
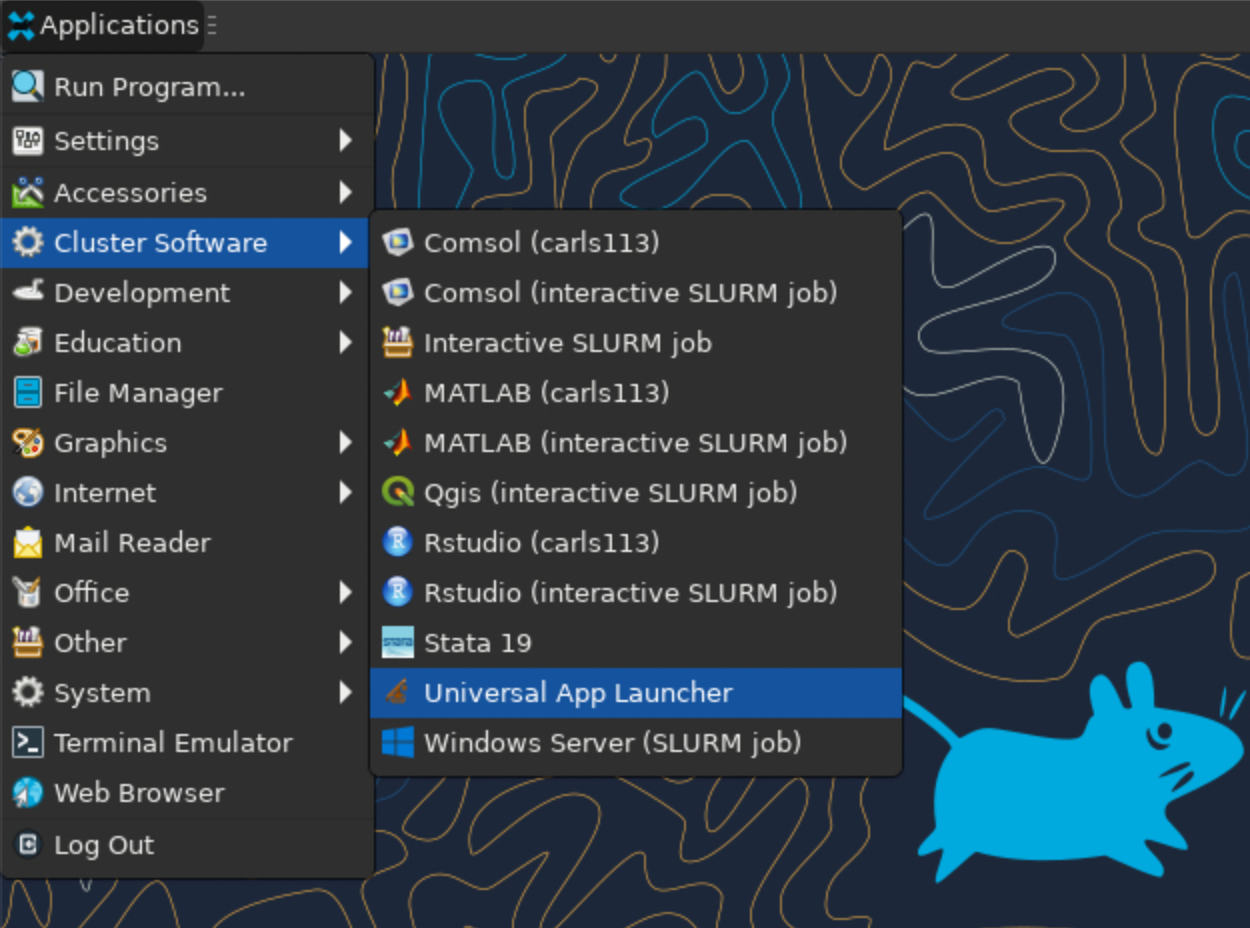
To find it, simply open the "Applications" menu in ThinLinc, naviagte to the "Cluster Software" section and select the "Universal App Launcher."
Account Selection
Once launched, it will open a menu where you can select which account you want your resource request attributed to.
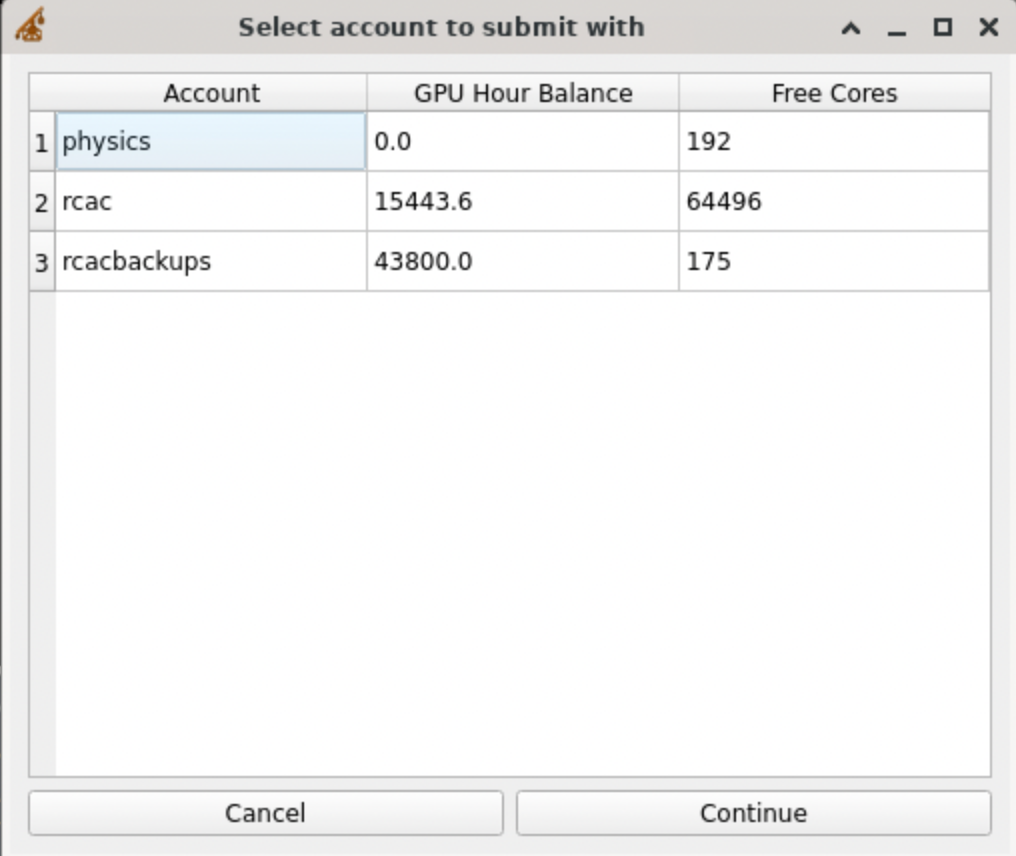
Your menu will have different accounts available to it, according to which research group(s) you are a part of.
Partition and QoS Selection
After selecting the account and clicking "Continue", you will be taken to a menu where you can select which partition and Quality of Service you want to submit to.
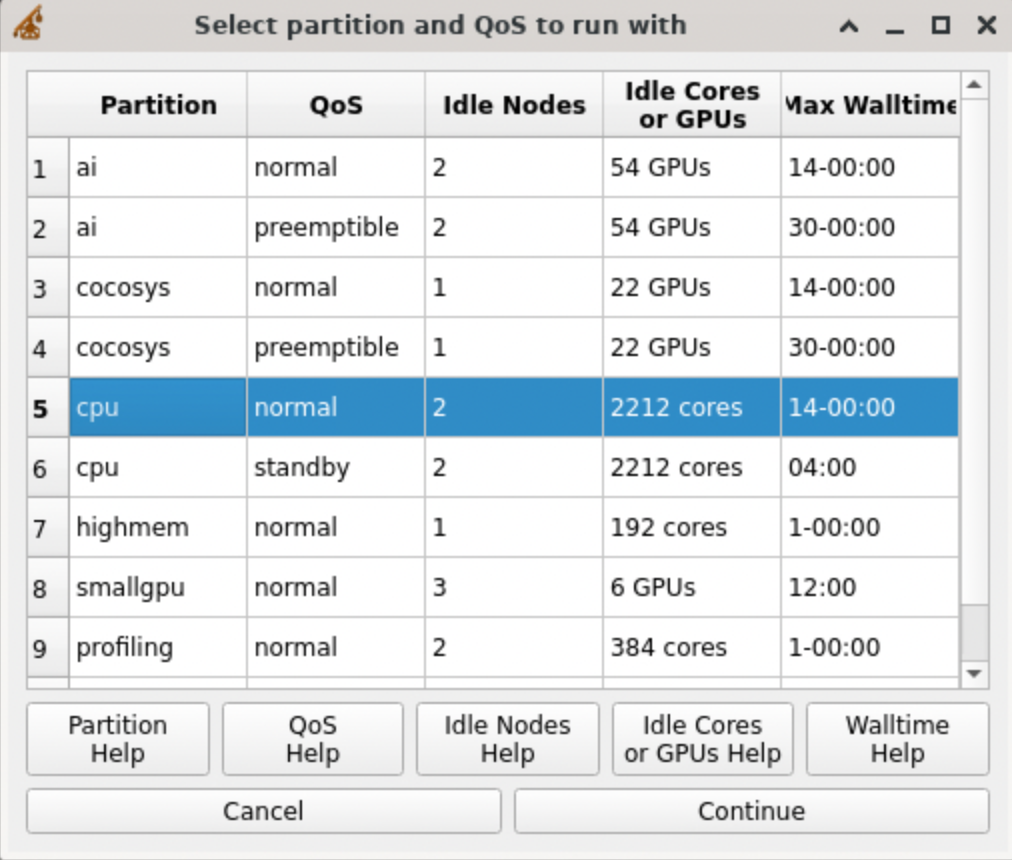
If you would like additional explanation of each of the terms and options, you can click on any of the "Help" buttons below, which will open a window with additional information, helping you make your choice. Unless you know you need a GPU, I would suggest starting with the CPU partition with the normal Quality of Service (QoS).
Software Selection
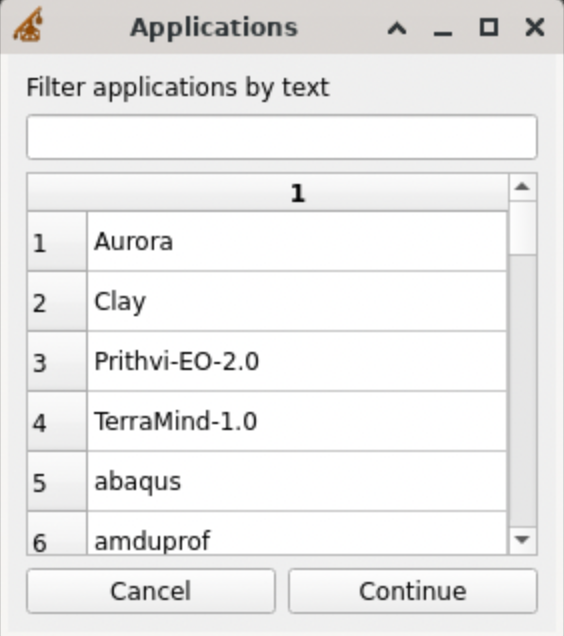
Once you have selected your desired Partition and QoS combination and clicked "Continue", you will be taken to a table that contains all the applications available on Gautschi. You can filter the available options by typing in the white box at the top of the window.
Version Selection
After selecting the application you want to launch and clicking "Continue", a window with the different versions available to use will appear. Often, there will be a single option here, but if there are multiple and you are unsure of which version you need, a helpful default would be the most recent/highest version.

In this post, we are using the Abaqus application as an example, but you could choose anything that is available on Gautschi.
Dependency Selection
If your application has dependencies (other modules that are needed to make it work), a window with the available dependencies will appear.
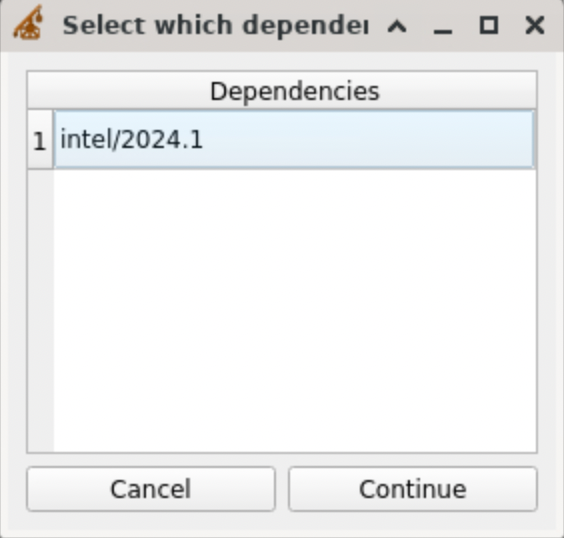
In our case, there is only one option, but for other applications, there may be multiple options for dependencies.
Additional Slurm Specifications
If your application does not require any dependencies, or after you have selected the dependency set you would like to load, a window will appear with additional Slurm resource request options.
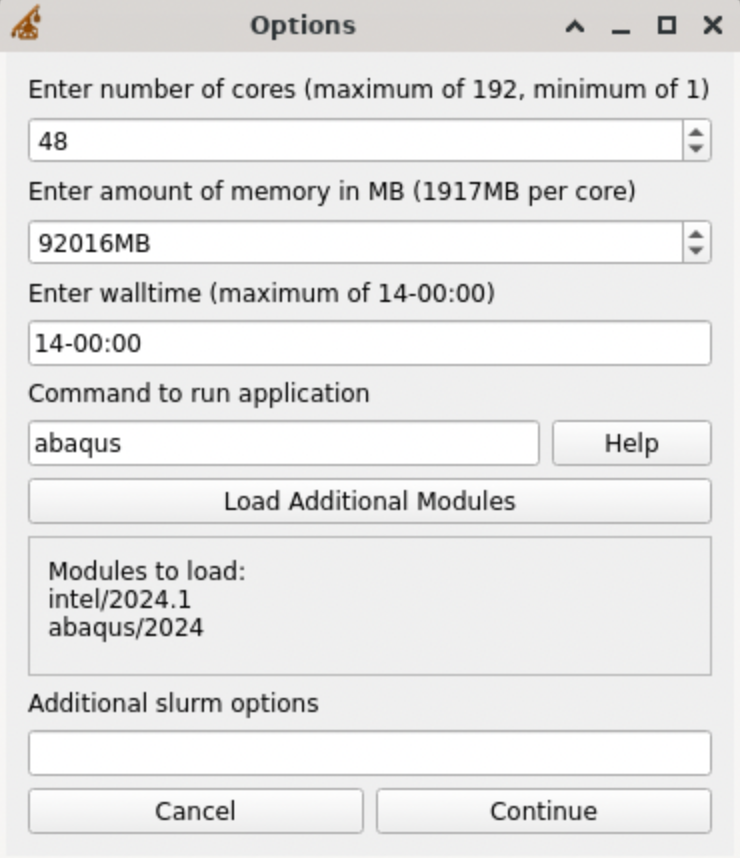
There is a lot here, but this post will go through all the options and explain them all.
Cores
First, there is the number of cores you want to request. The CPU nodes on Gautschi have a total of 192 cores on them, so a reasonable request would be a quarter of the node, or 48 cores, which is the default. Changing this number will modify the next option box, which is the amount of memory in MB.
Memory
If you are unsure of how many cores you will need, but do know how much RAM your workflow will take, you can instead specify the amount of memory required and it will change the number of cores to match your memory request.
Walltime
Third is the walltime. This is how long your job will run before being terminated. You can always end a job early, but you cannot extend the walltime of a job, so it is important to give yourself enough time to get all your work done. The format of the walltime is days-hours:minutes, so the default (and maximum) for the CPU partition under the normal QoS is 14 days. The maximum time for the standby QoS is 4 hours.
Software Command
Next is the most important option of all of them: the command to run the application. This is what will be run on the compute node that you request. If this is wrong, your job will fail, or have unexpected behavior. The default is just the name of the application that you would like to load. As an example, this would work well for Comsol, because the command to launch it is just comsol. In our example, we would actually need to edit this, because if we wanted to launch Abaqus in a graphical mode, we would need the command: abaqus cae -mesa. If you have questions about this part, you can always ask our support team for assistance.
Loading Additional Software
Fifth is a button to load additional modules. This is for if you want/need any additional applications to be available to your compute session. If you do need additional modules, you can click this button and it will open another window, where you can choose any other application that you want to add to your session.
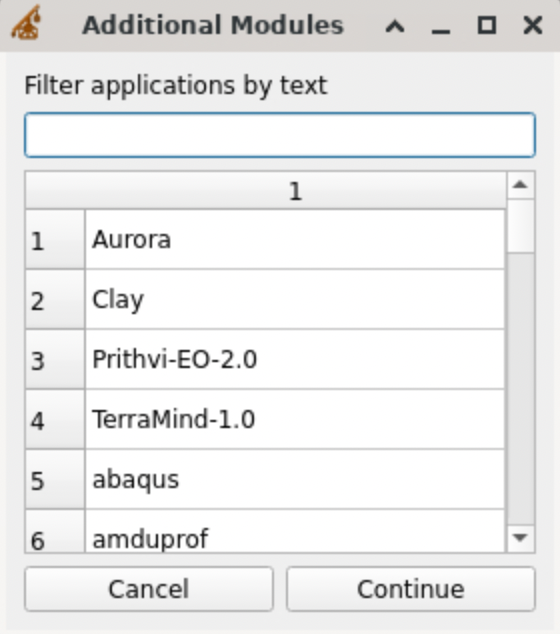
After selecting any additional modules you want, if they have dependencies, you will be taken to the same dependency table window you may have seen earlier, except with the dependencies for the additional module you have selected.
You can add as many additional modules as you would like through this menu.
Module List
Right below the Load Additional Modules button, there is a box that contains a list of all the modules that will be loaded into your session in the order that they will be loaded. This is for informational purposes, to make sure you are loading everything that you want in your session and to keep track of what you have already selected.
Additional Options
Lastly, there is a box for any additional Slurm options that you may want to add to your resource request. This is rarely needed and most often will be left blank, but is there just in case.
The End
Once you are all set with all the modules you want and all the options correct, you can hit continue and your resource request will be queued by the scheduler, Slurm. After your resource request makes it out of the queue and starts, the specified command will be run on a compute node and you are good to go.