Scholar Spark Nodes
You are viewing an unlisted demo page for early users of the Spark partitions
This page is unlisted and contains information that might not represent the current state of Scholar Spark nodes.
In particular, the scholar account cannot yet access Spark nodes, and the spark-interactive and spark-batch partitions do not yet exist.
Early users should instead use the testpbs account and the scholar-l or scholar-k partitions.
Overview
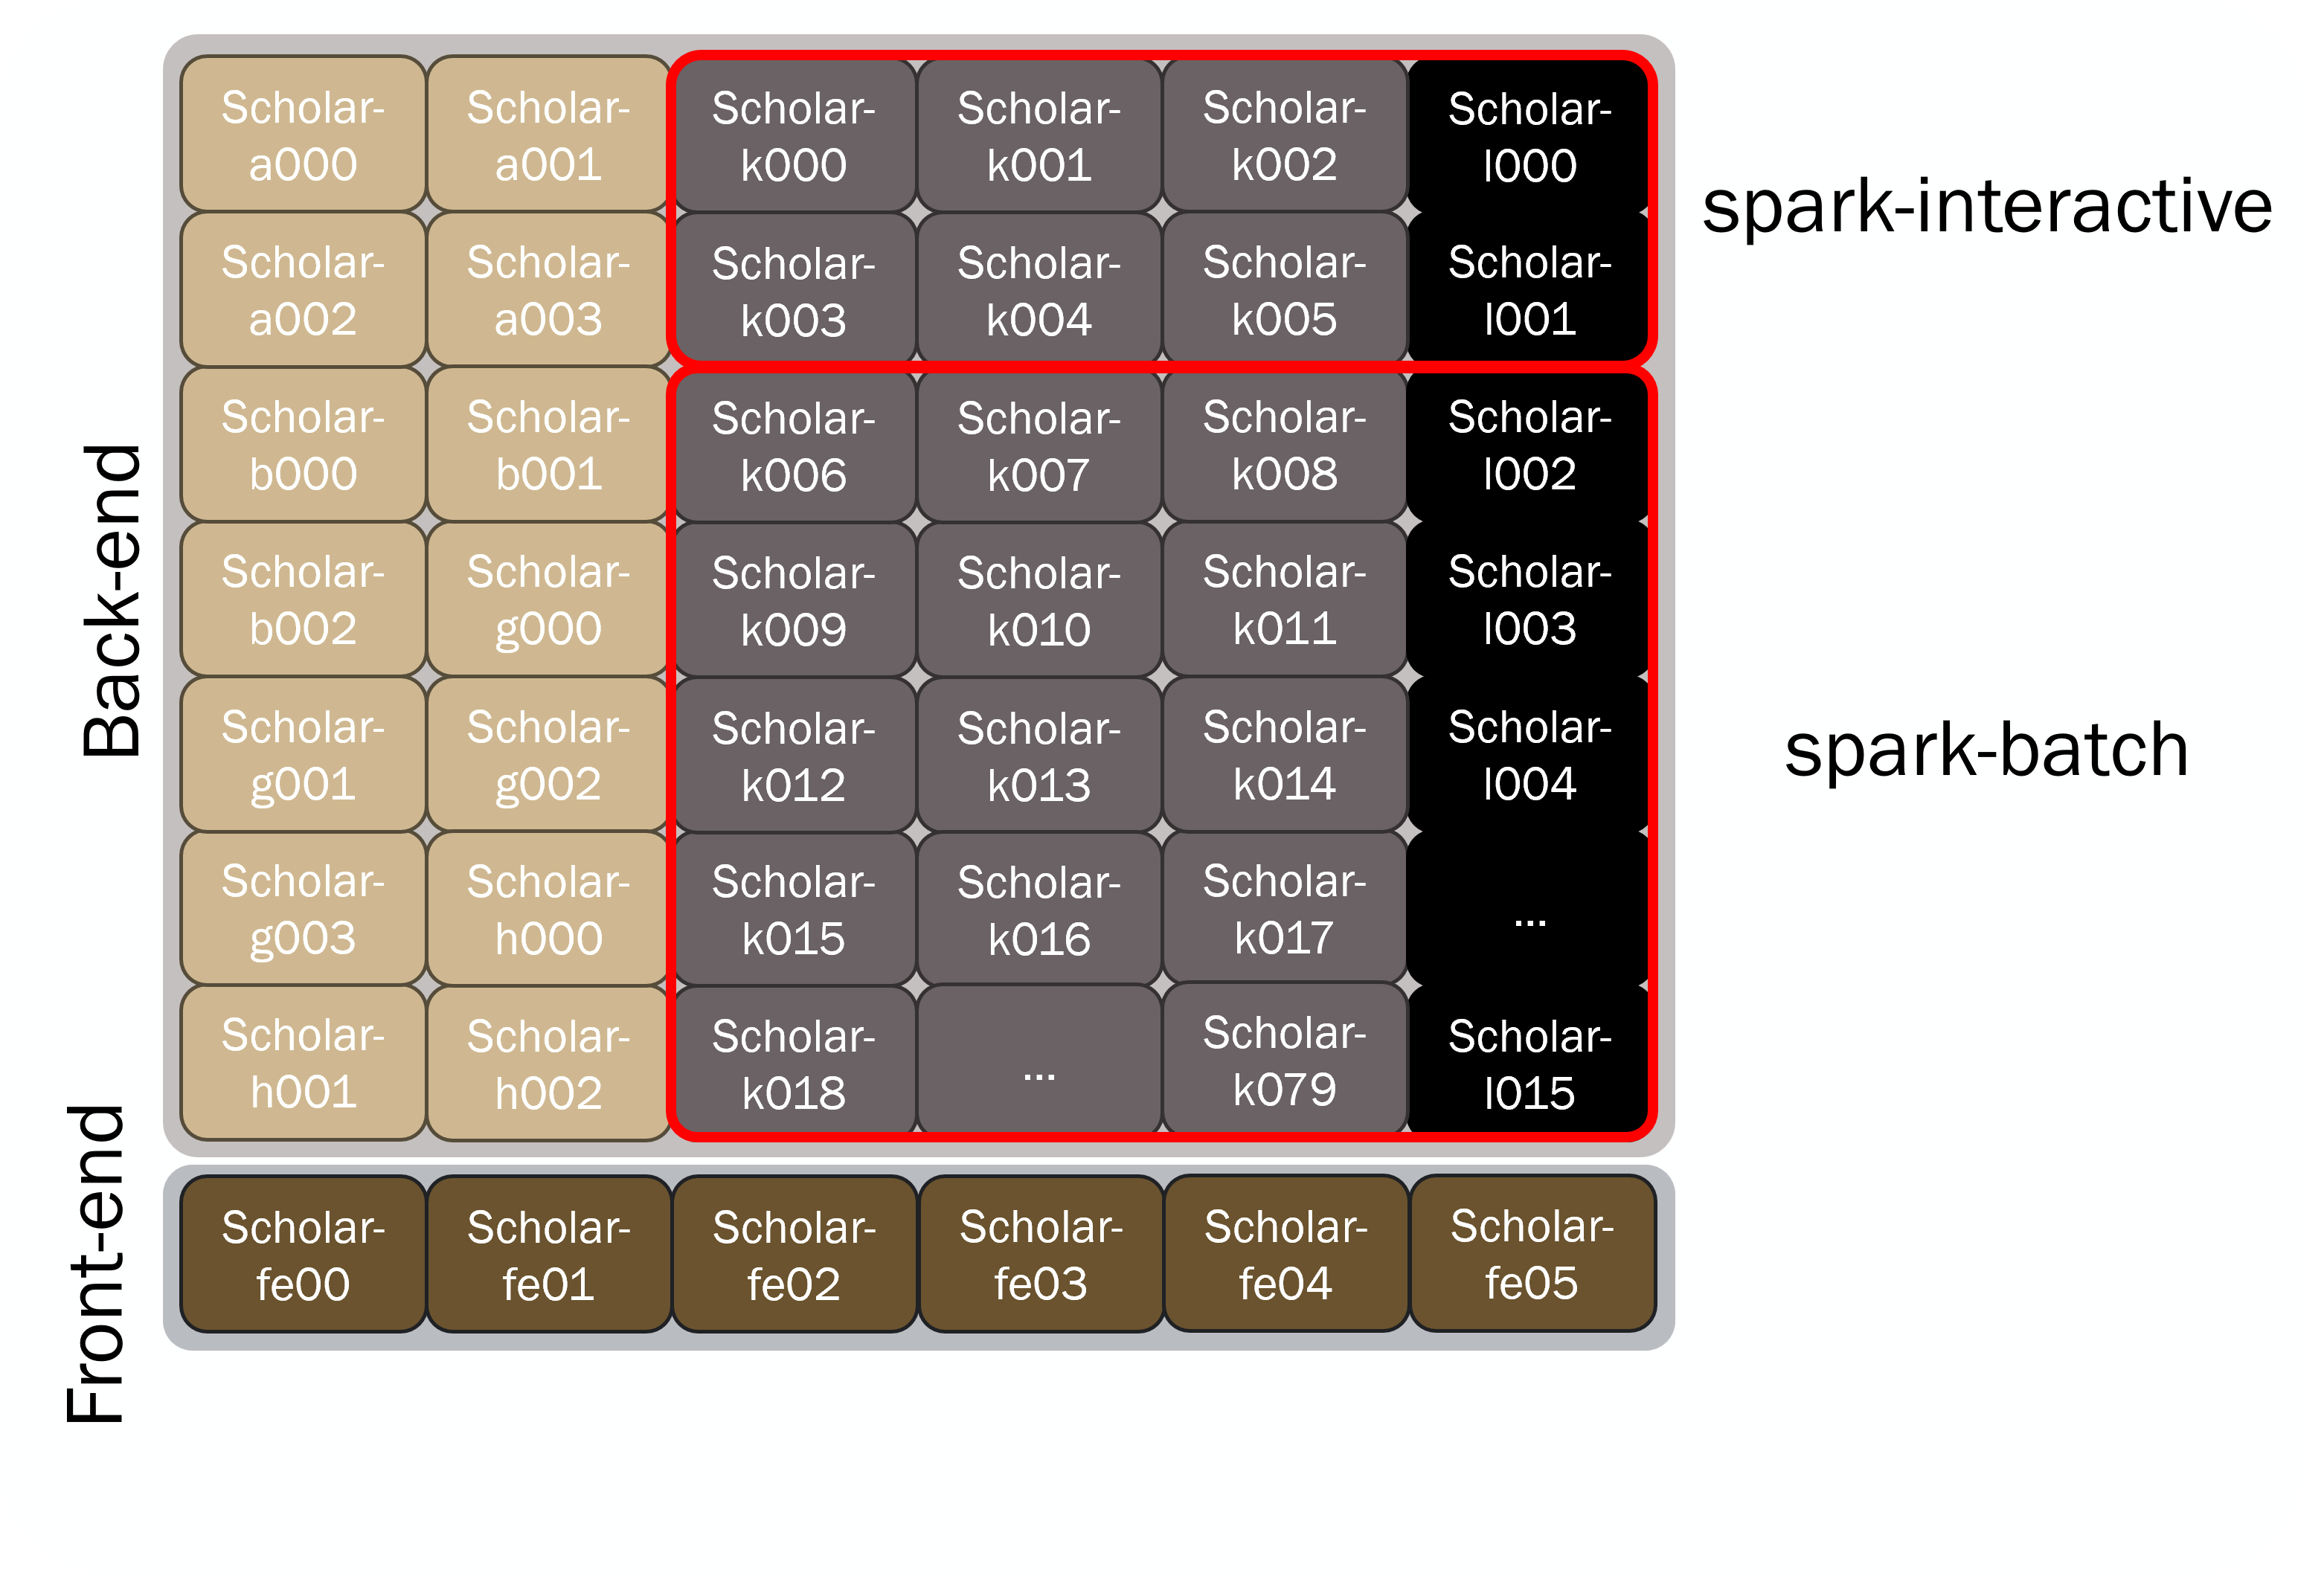
Scholar Spark nodes exist as a unique subset of our Scholar instructional cluster. They can be accessed as a typical cluster, with a job scheduler distributing batch jobs onto its worker nodes, or as an interactive resource, with software packages available through a desktop-like environment on the spark-interactive nodes.
Specifications
The scholar-l and scholar-k subclusters provide access to NVIDIA GB10 Grace Blackwell systems. The scholar-l subcluster contains Dell Pro Max with GB10 nodes, while the scholar-k subcluster contains NVIDIA GB10/DGX Spark nodes. Each node includes a 20-core Arm Grace CPU, 128 GB of LPDDR5X coherent unified CPU/GPU memory, and one NVIDIA GB10 Blackwell GPU.
All Spark nodes run the Ubuntu 24.04 LTS operating system.
| subcluster | System | Number of Nodes | Processors per Node | Cores per Node | Memory per Node | GPUs per Node |
|---|---|---|---|---|---|---|
| scholar-l | Dell Pro Max with GB10 | 16 | NVIDIA GB10 Grace CPU, 10 Cortex-X925 + 10 Cortex-A725 cores | 20 | 128 GB LPDDR5X coherent unified CPU/GPU memory | 1 NVIDIA GB10 Blackwell GPU |
| scholar-k | NVIDIA DGX Spark / GB10 nodes | 80 | NVIDIA GB10 Grace CPU, 10 Cortex-X925 + 10 Cortex-A725 cores | 20 | 128 GB LPDDR5X coherent unified CPU/GPU memory | 1 NVIDIA GB10 Blackwell GPU |
*Memory is unified LPDDR5X shared by CPU and GPU, not separate system RAM plus GPU VRAM.
Important: Scholar-Spark Nodes have aarch64 architecture
Programs built for x86_64 architecture will NOT be able to run on Scholar-Spark. See the Software & Applications section below for more details.
Layout
The Spark nodes are a subset of the broader Scholar instructional cluster. Because of this, there are not dedicated front-end nodes. Instead, users can perform work interactively on a "spark interactive" node. Further, being a subset of Scholar, the Spark nodes share the same Slurm scheduler and filesystems (/home, /scratch, /depot, /class, and /apps) as the broader Scholar cluster. See the Storage Systems user guide page for more details!
Partitions
The Spark nodes are are split into two partitions:
- Spark Interactive
- Spark Interactive nodes are "oversubscribed" and are available for immediate access by students and researchers through the Slurm scheduler.
- These are a shared environment that is useful for interactive work and staging heavier computational work.
- Spark Batch
- These nodes function like traditional back-end compute nodes, and allow you to request resources exclusive to you through the Slurm scheduler.
- If the resources you requested are not available, your job will be queued and will run when resources become available.
Accessing Spark Nodes
Interactive Open OnDemand Applications
To run Open OnDemand applications on a Spark node, you will first need to log into gateway.scholar.rcac.purdue.edu. On the top ribbon, you will see an "Spark Apps" dropdown menu that contains all interactive applications designed for use on Scholar Spark nodes.
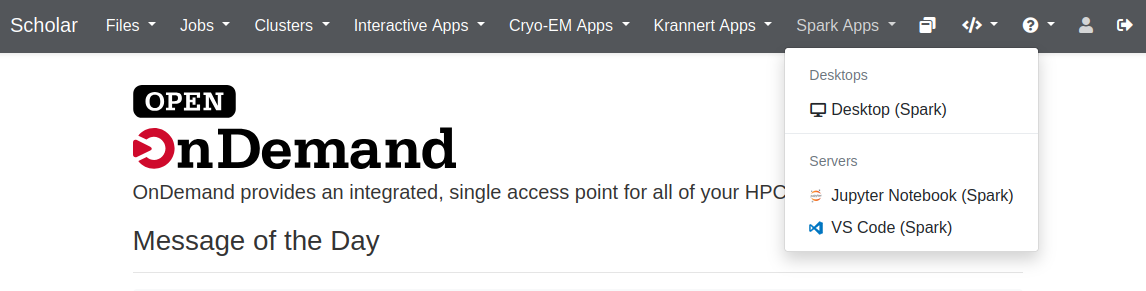
Selecting any of these will bring you to a submission page to specify the account, partition, and resources to request. Details on the available interactive applications are given below:
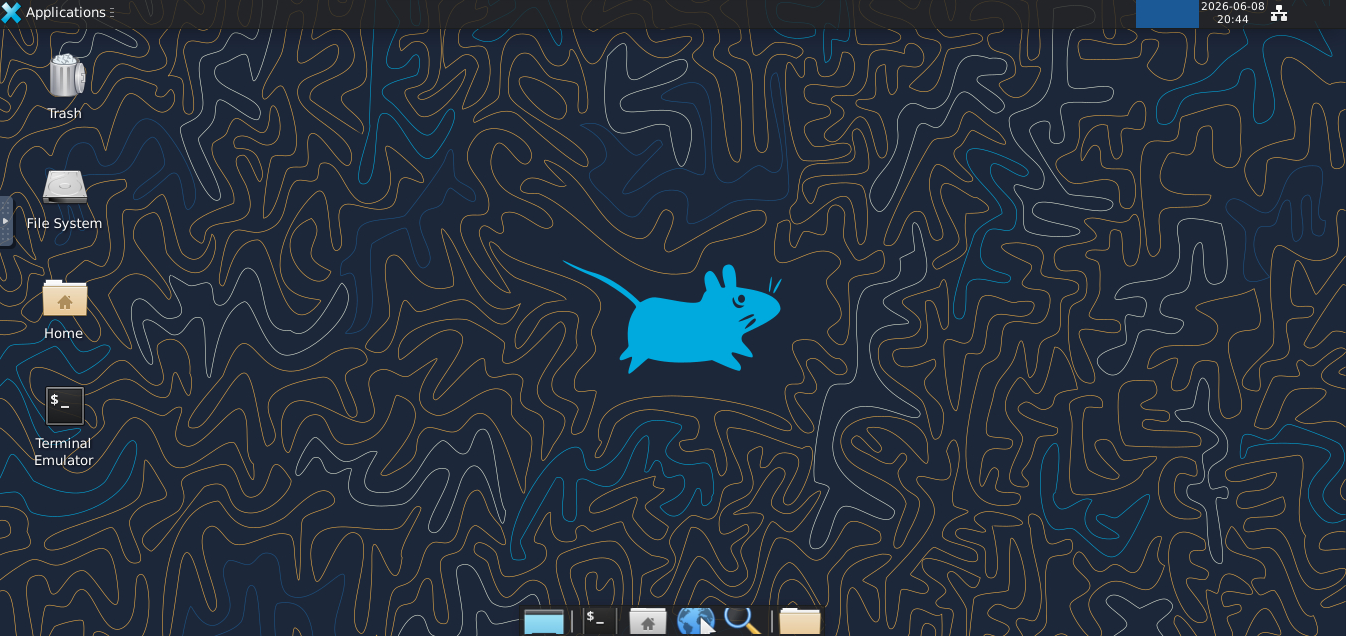
The Desktop (Spark) option provides a virtual desktop on a Spark node, running completely in your browser. This can be useful for running graphical applications, or for users with limited command line experience.
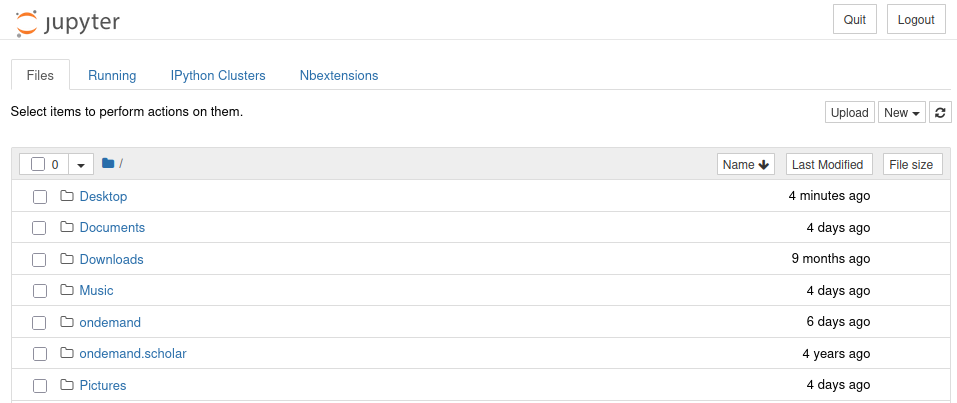
The Jupyter Notebook (Spark) will launch a Jupyter server on a Spark node, which will be displayed in your browser.
The default kernels (Python, R, Julia) available on Jupyter Spark are all aarch64 compatible. Users are also able to install their own kernels from conda environments via:
or by building the conda environment via the conda-env-mod command. As with all applications on Spark nodes, please ensure that they are aarch64 compatible.
The VS Code (Spark) will launch a Visual Studio Code server on a spark node, which will be displayed in your browser.
This can be useful for on-cluster development and code management.
Accessing Through Scholar Frontend
As Scholar Spark nodes exist within the broader Scholar cluster, you must first login to the Scholar front-end to access the Spark nodes. Once you are logged into Scholar, you can navigate onto the Spark nodes. An overview of the methods for accessing Scholar are given below, but complete details can be found in the Scholar Accounts userguide page.
Once logged in, you can submit resource requests to the Slurm scheduler to request resources on the Spark nodes. These can either be batch jobs or interactive jobs.
To request resources on Spark nodes specifically, you need use a Spark specific Account and Partition:
Different Accounts and Partitions Necessary for Early Users
Early users of Spark nodes should instead use the following accounts and partitions:
--account=testpbs--partition=scholar-lor--partition=scholar-k
To access Spark nodes, you must submit jobs through the scholar account.
This can be specified via the command line options:
or
Accessing Spark nodes also requires that you submit jobs through one of the two Spark partitions:
spark-interactive- Spark Interactive nodes are "oversubscribed" and are available for immediate access by students and researchers through the Slurm scheduler.
- These are a shared environment that is useful for interactive work and staging heavier computational work.
spark-batch- These nodes function like traditional back-end compute nodes, and allow you to request resources exclusive to you through the Slurm scheduler.
- If the resources you requested are not available, your job will be queued and will run when resources become available.
These can also be specified via command line options:
or
Batch Job Example
The following script requests a batch job with 10 cores and 1 gpu for a 1 hour duration
#!/bin/bash
#SBATCH  --account=scholar
#SBATCH  --partition=spark-batch
#SBATCH  --time=0-1:00:00
#SBATCH  --nodes=1
#SBATCH  --cpus-per-task=10
#SBATCH  --gres=gpu:1

module load modtree/spark

echo "This job is running on $(hostname)!"

hostnamectl | grep "Hardware Model"
You can submit this job to the Slurm scheduler with the command:
Interactive Job Example
Alternatively, you can request an interactive shell on a Spark node via the sinteractive command. The submission options are identical to batch submission, but you will instead be placed in an interactive shell running on a Spark node.
In the example below, running sinteractive on a frontend node results in a shell running on scholar-l005. Make sure that the correct module tree is loaded on Spark nodes!
username@scholar-fe00 ~ $ sinteractive -A scholar --partition=spark-interactive --time=0-1:00:00  --nodes=1 --cpus-per-task=10 --gres=gpu:1
salloc: Pending job allocation 456808
salloc: job 456808 queued and waiting for resources
salloc: job 456808 has been allocated resources
salloc: Granted job allocation 456808
salloc: Waiting for resource configuration
salloc: Nodes scholar-l005 are ready for job
username@scholar-l005 ~ $
username@scholar-l005 ~ $ module load modtree/spark
Software and Applications
RCAC offers a wide array of pre-installed applications and libraries across many different disciplines. These applications are accessible through the LMod module system. This module system can load and unload programs and commands within your shell environment.
On Spark nodes, which contain aarch64 architecture, you must have the Spark module tree loaded, which can be done with the command module load modtree/spark. The modules that are available in the rcac and modtree/all module trees are built with x86_64 architecture. and will not work on Spark nodes.
Once the Spark module tree is loaded, users can see available modules with the module avail command:
module load modtree/spark
module avail

--------------- /opt/scholar-dgx-modulefiles/dgx/Core ----------------
   anaconda/2025.12-py313          libxslt/1.1.45
   cmake/3.31.11                   modtree/all
   conda/2026.05                   modtree/loader
   conda/2026.06          (D)      modtree/spark             (L,D)
   cuda/12.9.1                     nvhpc/26.1
   cuda/13.1.1            (L,D)    openblas/0.3.30
   cudnn/9.17.0.29-12              pandoc/3.7.0.2
   cudnn/9.17.0.29-13     (D)      proj/9.7.0
   gcc/12.5.0             (L)      protobuf/34.0
   gcc/14.2.0             (D)      r/4.5.2
   julia/1.12.6                    texlive/20250308
   jupyter/2026.05                 totalview/2025.4-linux-arm64
   libiconv/1.18                   util-linux-uuid/2.38.1
   libpng/1.6.37                   xcb-util-cursor/0.1.4
   libtiff/4.7.1                   xcb-util-image/0.4.1
   libxml2/2.15.1                  xcb-util-keysyms/0.4.1
   libxp/1.0.3                     xcb-util-renderutil/0.3.10
   libxscrnsaver/1.2.2             xcb-util-wm/0.4.2
Important: Scholar Spark Nodes have aarch64 architecture
Programs built for x86_64 architecture will NOT be able to run on Scholar Spark nodes. This includes all modules loaded in the rcac and modtree/all module trees. We provide a separate module tree with aarch64 built programs that can be loaded with:
Example: Pytorch Conda Environment
Load Necessary Modules:
Create Environment (Placed in ~/.conda/envs_aarch64/ by default):
conda create -n "torch_test" python pip --yes
conda activate torch_test
pip3 install torch torchvision

# (optional) Add jupyter kernel (to ~/.local/share/jupyter/kernels)
conda install ipykernel --yes
python -m ipykernel install --user --name torch_test --display-name "Python (torch_test)"
Test:
python -c "import torch; print(torch.cuda.is_available()); A = torch.zeros([100,100], device='cuda:0'); print(A)"
True
tensor([[0., 0., 0.,  ..., 0., 0., 0.],
        [0., 0., 0.,  ..., 0., 0., 0.],
        [0., 0., 0.,  ..., 0., 0., 0.],
        ...,
        [0., 0., 0.,  ..., 0., 0., 0.],
        [0., 0., 0.,  ..., 0., 0., 0.],
        [0., 0., 0.,  ..., 0., 0., 0.]], device='cuda:0')
FAQs
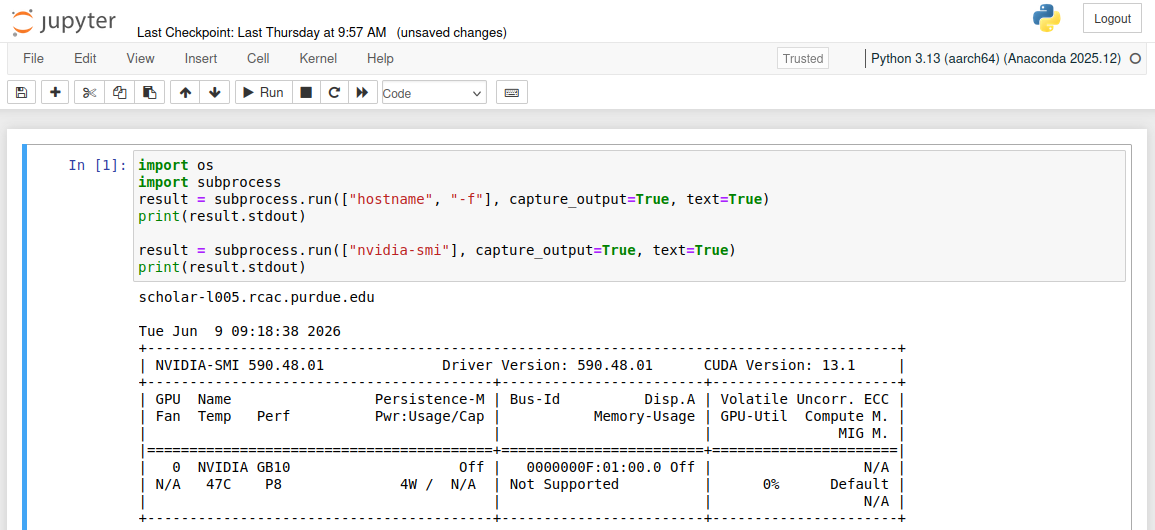
How can I tell that I'm on a Spark node?
To ensure that you are on a Spark node, you can use the hostname command to see if you are on one of the subclusters containing DGX Spark nodes.
If the hostname command returns either scholar-lXXX.rcac.purdue.edu or scholar-kXXX.rcac.purdue.edu, you're currently running on a Spark node!
My applications give a Exec format error on the Spark nodes
Error messages like cannot execute binary file: Exec format error are caused when you try running an x86_64 application on a host with aarch64 architecture. If you are using centrally installed applications, please ensure you are using the spark modules, which can be loaded with:
If you have built or downloaded your own applications, please rebuild any applications on a Spark node, or check for an aarch64 distribution of your software.
How can I check the architecture of the node I'm running on?
Since Scholar has nodes with x86_64 architecture and aarch64 architecture, it is important to pay attention to what the architecture is on the node you plan to build or run software on. You can use the following command to print the architecture of the node you are currently running on.
How can I separate my x86_64 applications from aarch64 applications?
If you plan on working on both aarch64 and x86_64 nodes, we strongly recommend separating applications and configurations in separate directories.
For example, you may choose to make separate bin directories for x86_64 and aarch64 applications. In your ~/.bash_profile file, you can then source the correct applications based on the architecture: